

Weather Resistance Differences Between Angular Prefab Structures for Mountain Sites

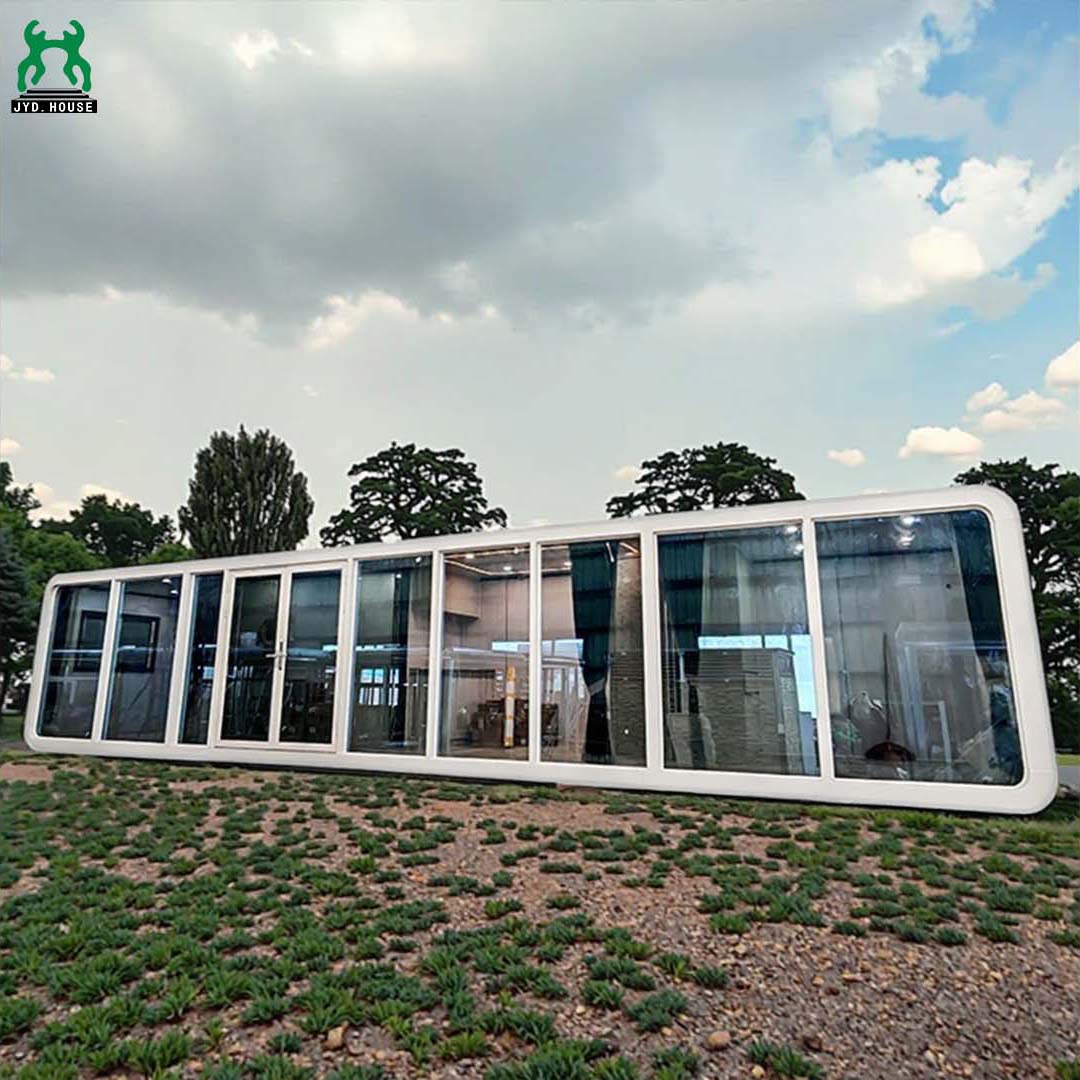
Mountain sites punish prefab buildings with fast-changing loads: wind, drifting snow, ice, heavy rain, strong UV, and wide temperature swings between day and night. The weather resistance differences between angular prefab structures for mountain sites often come down to roof pitch, corner flashing, connection stiffness, and drainage path. A curved capsule can shed wind better in some cases, while a folded angular roof can shed snow more cleanly if the pitch is steep enough. Buyers comparing a Space Capsule, an Apple Cabin, or a Security Booth should not select on appearance alone. This tutorial walks through how to evaluate angular prefab structures for high-elevation exposure, what to check before purchase, and where small detailing changes have the biggest effect on weather resistance.
Key Takeaways
- Angular roof forms resist mountain weather best when the slope, flashing, and drainage route are designed as one system.
- Snow load on a low-slope angular roof can exceed 3.0 to 5.0 kN/m² in some alpine regions, so slope and structure must be verified together.
- Corner and ridge joints require double-seal detailing because wind-driven rain attacks intersections first.
- Thermal movement from large temperature swings loosens fasteners over time, so inspect connections after the first winter.
- Curved shells and angular shells respond differently to wind, snow, and ice; choose based on the specific elevation and exposure.
What You Need Before Starting
Before comparing units, collect the site data that controls weather resistance. Without these numbers, a manufacturer cannot confirm the right panel thickness, roof slope, or anchorage.
- Site elevation, local ground snow load, and basic wind speed according to ASCE 7-22 or EN 1991-1-3.
- Exposure category: open ridge, forested slope, valley floor, or windward face.
- Corrosivity class under ISO 9223:2012, especially if the site uses road salt or sees wet snow and freeze-thaw cycles.
- Access width and crane reach if the unit must be delivered as a complete module.
- Confirmation from JYD House about which modular parts are shipped loose and stored in a 40-foot cabinet for site assembly.
If you already know the rough loading envelope, compare the product lines. A Space Capsule can fit compact scenic-Area deployments, while an angular Apple Cabin or Security Booth may suit staff housing, ticket booths, or guest units where a flat folded roof is part of the visual language.
Step 1 — Define the Mountain Weather Loads Before Comparing Geometry
What to Do
- Get the local design snow load from the national annex to EN 1991-1-3 or the ASCE 7-22 ground snow map. Some alpine regions can show ground snow loads from 3.0 to 5.0 kN/m², but the roof load depends on slope, exposure, and thermal factor.
- Get the basic wind speed at the ridge or clearing. Exposed mountain ridges often fall into high-wind categories; site-specific values can range from 35 to 50 m/s on open slopes.
- Ask for the ISO 9223 corrosivity class. A mountain site near a pass with de-icing salt can push the local classification toward C4, which changes fastener and coating requirements.
Why This Matters
Angular prefab structures concentrate weather action at ridges, eaves, and parapets. A roof that looks steep enough in a lowland catalog may still retain wind-packed snow at elevation if the pitch is under 6:12, approximately 26.6°. Many mountain builders use 6:12 as a practical minimum for snow-shedding, though steep alpine roofs often go steeper. Wind pressure also increases the effective uplift on a folded roof corner far more than on the middle of the panel.
Common Mistakes to Avoid
- Comparing products by roof slope only: The structural frame, panel joints, and anchorage matter just as much as the visible angle.
- Using lowland snow values: A valley snow load does not represent a windward ridge that collects drifted snow.
- Ignoring ISO 9223 corrosion class: Mountain air may look clean, but wet snow and road salt can create aggressive micro-environments around fasteners.
Step 2 — Compare Angular Roof Profiles, Corner Geometry, and Drainage Paths
What to Do
- Separate angular prefab structures into three groups: flat or low-slope folded planes, pitched gable or mono-pitch roofs, and multi-angled faceted shells.
- For each product, trace the water path from the highest ridge to the ground. Look for flat ledges, open seams, or recessed joints where water can pool.
- Compare the roof-to-wall transition. The strongest angular design likely includes a raised eave, a continuous drip edge, and a folded metal cleat at the ridge.
The table below summarizes what to check.
| Weather Factor | Low-Slope Angular Roof | Steep Pitched or Gable Roof | Multi-Angled Faceted Shell | Site Check |
|---|---|---|---|---|
| Snow retention | High risk if lower than 6:12 | Lower risk; snow slides faster | Mixed; facets can trap snow at valley lines | Ask for calculated roof snow load |
| Wind-driven rain | Joints at eave and corner most exposed | Better overhang coverage, but gable ends need bracing | Wind pressure varies sharply across facets | Check flashing and sealant access |
| Ice damming | Common at cold eave edges | Reduced with continuous ventilation | Can form at folded valleys | Verify heated eave or cold roof detail |
| Drainage | Water pools on small depressions | Direct path if drain outlets are at low edges | Needs valley drains and clean transitions | Request drainage layout drawings |
| UV and thermal movement | Large flat panels expand and contract visibly | Smaller panels can manage movement better | Facet joints absorb some movement | Ask about joint width and sealant type |
Why This Matters
An angular prefab structure can fail at the corner before the roof itself fails. Water hitting a vertical side wall under wind pressure wets the joint, then capillary action pulls moisture inward. That is why the most important weather resistance difference is often found in the corner flashing detail, not in the overall shape.
Common Mistakes to Avoid
- Choosing a steep roof without checking valley drainage: A gable may shed snow well but send meltwater into one narrow downspout that freezes.
- Assuming all angular corners are equal: A folded metal corner may look good but create a hidden water trap if the overlapping lip faces the prevailing wind.
- Forgetting access for maintenance: Mountain sites can bury roof penetrations under snow, so drains must stay reachable.
Step 3 — Select Envelope Materials and Sealed Joints for High Humidity and Freeze-Thaw
What to Do
- Check that the prefab wall and roof panels have a complete air and water barrier, not just an exterior skin. For cold climates, look for a continuous thermal break at the floor and wall connection.
- Ask how the manufacturer treats panel-to-panel joints. Angular units need a primary seal, a secondary drainage plane, and accessible battens or covers.
- If possible, request air leakage test results following ASTM E283. Lower air leakage reduces moisture carried into the wall cavity during wind-driven rain.
Why This Matters
Mountain weather pushes moist air into every opening. When nighttime temperatures drop below freezing, trapped water expands and peels flashings. A prefab unit that passes a controlled test under ASTM E283 gives the buyer more confidence that the angular wall joints will not become a hidden ventilation path. ISO 9223:2012 helps classify the outdoor environment, but the internal cavity conditions depend on joint sealing and drying direction.
Common Mistakes to Avoid
- Sealing both sides of a joint: This traps moisture inside the panel and slows drying. The interior side should remain vapor-open or dry to the inside by design.
- Using only silicone on a moving joint: Mountain temperature swings can exceed 30°C in a day. The sealant must handle movement, or it tears.
- Ignoring floor-to-wall transitions: Snow melt and rain splash collect at the base, so a raised threshold and drained floor edge matter as much as the roof.
Step 4 — Verify Anchorage, Connection Stiffness, and Thermal Movement
What to Do
- Ask for the design reaction loads at each anchor point based on the site wind and snow load.
- Check that the prefab structure can be anchored to a concrete pad, driven piles, or screw piles without relying on the wall panels to carry all uplift.
- Specify corrosion-resistant anchors and brackets. In mountain environments with wet snow and de-icing salt, a fastener class suited to ISO 9223 C4 may be safer than a standard indoor fastening.
Why This Matters
A strong roof is useless if the whole angular shell lifts at the corner. Uplift from wind on a folded roof can exceed the unit weight at exposed ridges. The structural frame must transfer that force down to a foundation with enough ballast or anchorage. Angular prefab buildings also move with temperature changes, and a rigid anchor that does not allow small movement can crack the exterior panel at the corner.
Common Mistakes to Avoid
- Anchoring only at the four corners: Long modules can flex in the middle and open panel joints under wind gusting.
- Using uncoated hardware: A cheap bolt rusts fast in freeze-thaw and salt exposure, even if the wall panels look fine.
- Overlooking foundation drainage: Water that pools under the unit refreezes and can lift or shift the module over time.
Step 5 — Plan Snow Shedding, Ice Drainage, and Cold-Weather Access
What to Do
- Orient the angular roof so the main snow-shedding side does not discharge onto entry paths, vehicles, or utility connections.
- Install heated eave tape or a cold roof detail where local conditions create ice dams. The goal is to keep meltwater moving to a drain that will not freeze closed.
- Mark the location of roof drains, downspouts, and overflow scuppers. A drain hidden behind a folded corner will be hard to find after a 1-meter snowfall.
Why This Matters
Snow that slides from a steep angular roof can damage anything below the eave. The prefab building itself may survive, but the site becomes unsafe if snow blocks the door or falls on a person. Weather resistance therefore includes site planning around the roof, not only the shell.
Common Mistakes to Avoid
- Placing the main entrance under the downslope roof edge: Snow and ice sliding from the roof can hit the door or occupants.
- Sizing downspouts for summer rain only: Meltwater from a large roof can freeze in a narrow pipe and back up into the wall.
- Ignoring the roof surface temperature: A warm interior can melt snow from below, refreeze at the eave, and create an ice dam even on a steep roof.
Step 6 — Inspect After Delivery and After the First Winter Storm
What to Do
- Before lifting the module, inspect all roof panel corners, ridge seams, and wall-to-floor joints for shipping damage or sealant gaps.
- After the first storm, check for drifted snow inside roof valleys, ice at the eave, and damp marks around interior corner trims.
- Record the movement of joints and re-tighten anchor points if the manufacturer requires it. If the unit is assembled from loose parts stored in a 40-foot cabinet, confirm that the on-site assembly crew follows the torque and seal sequence.
Why This Matters
Weather resistance is proven on-site, not in a brochure. Mountain conditions expose small defects quickly. A cold morning after a wet, windy night is the best moment to inspect because wet areas will show up before the sun dries them. A consistent post-installation inspection routine extends the life of the angular shell and helps catch issues before they reach the insulation layer.
Common Mistakes to Avoid
- Skipping a pre-lift inspection: Once the module is anchored and snow arrives, correcting a ridge seal defect becomes difficult.
- Applying caulk over wet or frozen surfaces: The sealant will not bond, and the joint will fail in the next storm.
- Waiting until spring to inspect: Small leaks can cause freeze-thaw damage inside the panel all winter.
Pro Tips for Success
- Ask JYD House for the exact roof pitch, valley drainage detail, and panel joint section before you buy, then compare those drawings across the Space Capsule, Apple Cabin, and Security Booth categories.
- If the unit is delivered as loose parts packed in a 40-foot cabinet, plan a sheltered on-site staging area so wind and rain do not wet open panel edges during assembly.
- Pre-drill and seal every roof-to-wall transition with a continuous tape or butyl strip, even if the manufacturer provides a metal flashing.
- Commission a local engineer to check the foundation reaction loads when the site has a ground snow load above 3.0 kN/m² or basic wind speed above 40 m/s.
- Buy an extra set of exterior trims and fasteners. Mountain weather will eventually damage a corner, and a matching repair kit prevents a small dent from becoming a leak.
Frequently Asked Questions
Are angular prefab structures better than curved capsules in mountain snow?
Angular units with a steep roof slope usually shed snow more cleanly than a low-curved shell, but only if the roof pitch, valley drainage, and eave detail are correct. A curved roof can still work if it is heated or designed to hold snow safely. The specific weather resistance differences between angular prefab structures for mountain sites require comparing the roof drawing, not only the shape.
What roof slope is a practical minimum for mountain snow?
Many cold-climate builders use 6:12, about 26.6°, as a practical starting point for snow-shedding. Steeper slopes may be needed on windward slopes where drifting snow accumulates faster than it slides. Always compare the chosen slope with the calculated roof snow load from EN 1991-1-3 or ASCE 7-22.
Can a standard prefab cabin survive high mountain wind?
Yes, if the manufacturer verifies the panel connection, roof-to-wall anchoring, and foundation reaction loads for the site-specific wind speed. Exposed ridges can experience gusts above 40 m/s, so a unit designed only for lowland wind may need extra anchors or bracing. Ask for structural calculation sheets before ordering.
How do I prevent corner leaks in an angular prefab unit?
The best protection is a two-stage joint: an outer rain screen or metal flashing to break the wind pressure, plus an inner water barrier. Make sure the overlapping flashing laps away from the prevailing wind. After delivery, inspect every corner and ridge seal, and repair any cracks before the first freeze.
Conclusion
Weather resistance differences between angular prefab structures for mountain sites appear in slope, corner flashing, drainage, anchorage, and movement joints. A well-designed steep angular roof can outperform a curved shell in snow country, while a poorly flashed folded corner will leak even if the rest of the unit looks strong. Start by defining the local snow load, wind speed, and ISO 9223 corrosivity class. Then compare the JYD House product lines, ask for joint and drainage drawings, and verify the anchorage before the first storm. After installation, inspect the module after the first wet, windy night and after the first heavy snow. Small corrections made before winter cost far less than panel repairs made after a mountain storm.